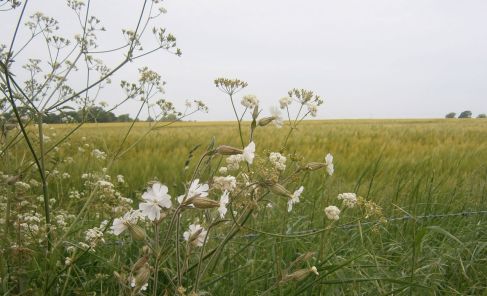
I was invited to take part on a research project into the making process. The idea was to change one’s habitual making process to encourage new outcomes. On the morning that I had decided to carry out the project I cycled to the studio and on the way took this photo – I knew that this was going to be the source of my design for the project.
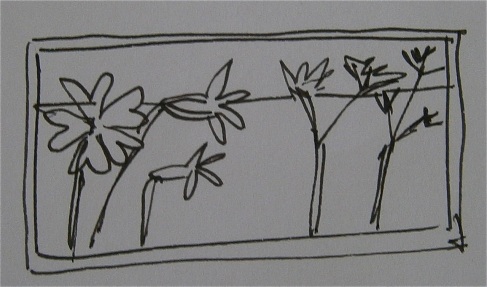
Once at the studio I did a quick sketch of a brooch that was going to be my intended outcome for the project:
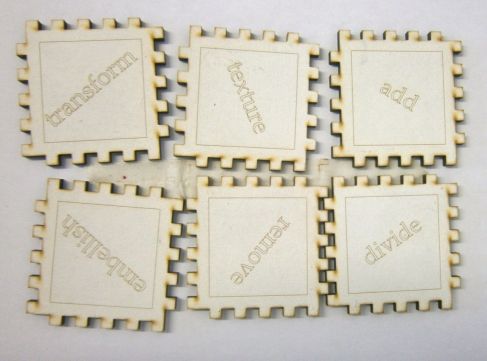
The project involved using one of two dice – one was tools and the other processes, they came as laser cut wood sheets with the dice faces having words on them that would instruct either a tool to be used or a process, not wanting to have to file or drill for half an hour I chose the process die.
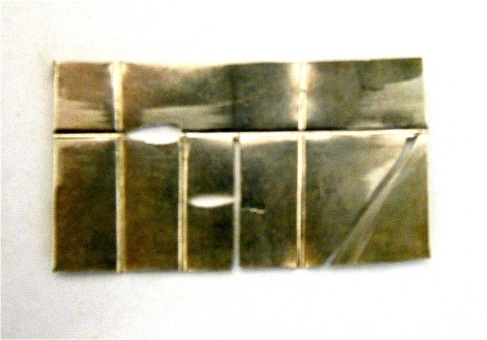
I started off with a piece of britannia silver, assembled the dice and got ready to do as I was told! The instructions said that I had to carry out the process that the dice instructed for 15-30 minutes.


The assembled dice
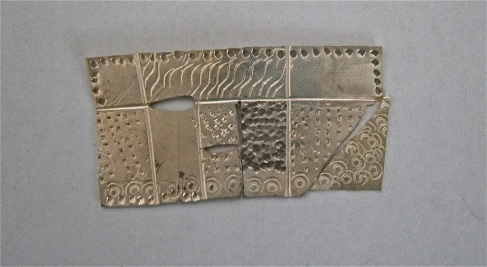
The first instruction was divide – I didn’t want to cut it up my lovely piece of silver, so set about dividing it up into sections roughly along the lines of my drawing. I spent ten minutes indenting the silver by hammering steel wire into the surface and then used a saw to make further divisions.
I rolled again and was happy to see “texture”, which I did by hammering, roll printing and using stamps, referring to my original drawing. I use these techniques in my work, but not usually to this extent. It felt strange to have to carry on texturing once I would naturally have finished.
The next time I rolled the dice said “embellish”, now I was really happy, I pieced out the flowers, soldered them on, bobbled the ends of some fine silver wire, shaped them and fused them to make the umbel flower, added gold by the keum boo technique and drilled a hole to add the pearl, I was totally absorbed in this and knew I would have to work quickly – all this and embellishment took 29 minutes.
The picture here is with the embellishments added before cleaning with pickle. One of the corners where I had pierced a line had come apart at this stage.
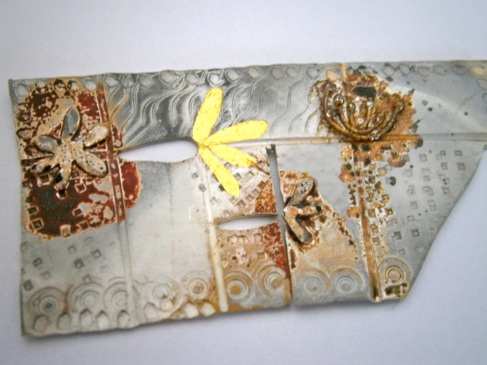
Luckily my next instruction was “Add” – so the corner went back on and I soldered a little plate onto the back to reinforce another pierced line.
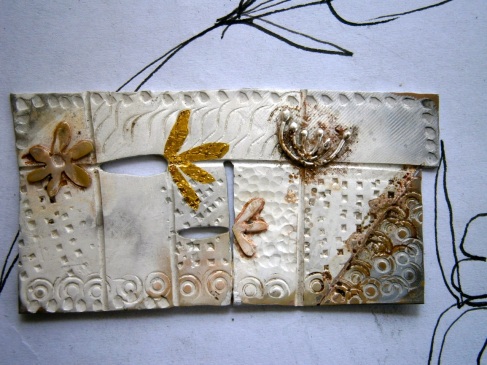
This was the end of the process die telling me what to do. I was allowed a further 30 minutes to finish off the piece. I shaped the brooch by hammering it with a mallet on an anvil, made a fitting for the back, oxidised it, polished it and added the pearl.

Brooch – Britannia silver, gold and fine silver embellishments
This project is part of a research degree being undertaken by Rebecca Steiner, if you would like to find out more about her projects visit www.workshopbee.blogspot.com


